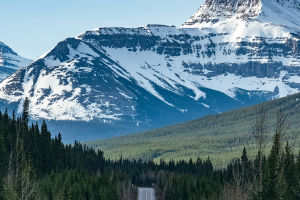
Welcome Lykkers! Ready to elevate your landscape shots? Majestic peaks reaching into the sky offer some of the most breathtaking views on Earth.
Yet, photographing them can be surprisingly tricky. This guide brings clarity to capturing mountains in all their glory, with practical tips to help anyone take memorable photos, no matter the season or elevation.
Understanding the Challenges of Photographing Mountains
Size doesn’t always make it simple
While their size makes mountains visually powerful, it also creates technical hurdles. Cameras don't replicate human vision exactly, so what appears spectacular to the eye may seem dull or distorted in an image.
The contrast between highlights and shadows can be intense, and the best spots for shooting often require trekking for hours with gear in tow.
Safety should always come first
Before venturing out, it’s important to plan ahead. Mountain weather shifts quickly. Bring a detailed map, food, water, and a flashlight. If possible, never go alone. Early mornings often offer the best light, so being at your spot before sunrise is key. But keep in mind: darkness falls fast among towering peaks.
Camera Settings for Mountain Photography
Start with the right format
Set your camera to shoot in RAW. This format retains the highest level of image data and provides flexibility in editing later.
Set your white balance manually
Avoid relying on automatic white balance. While RAW files allow for post-editing adjustments, inconsistent white balance across photos can become tedious to fix. Select a mode that matches the environment—sunny, cloudy, or shaded—for a consistent outcome.
Choosing the Right Lens and Composition
It’s not all about wide-angle lenses
Though large subjects often seem like a job for wide-angle lenses, that’s not always the case. Ask yourself:
- Is the foreground visually pleasing or free of distractions?
- Is the mountain close enough to capture detail?
If yes, look for an object or feature to anchor your foreground—a cluster of flowers, hikers, or rocks can create a strong sense of depth. Lowering the camera can emphasize foreground elements while keeping the peaks in view.
When zoom brings the magic
Telephoto lenses (typically from 70mm to 200mm) allow focusing on specific ridges or patterns of light and shadow across the slopes. This lens choice avoids the generic “postcard” look common in wide-angle images taken from popular spots. It also adds uniqueness to your shots and lets you capture details others might miss.
Preparing Your Camera Before the Shot
Keep ISO low for crisp images
Start with the lowest ISO setting available on your device—typically ISO 100 or 50. This reduces image noise and keeps photo quality high.
Get your focus right
Use manual mode and close the aperture to around f/11. This increases the depth of field, helping keep as much of the scene in focus as possible. Aim for the hyperfocal point—the distance where everything beyond it stays sharp. The longer the focal length, the farther this point moves.
Free apps such as HyperFocal Pro (Android) or SetMyCamera (Apple) can assist with calculating this based on your gear and distance.
Set your shutter speed wisely
Adjust the shutter speed based on your camera’s light meter. Be mindful of the "safe" handheld limit: shutter speed should be at least the inverse of your focal length. For instance, with a 24mm lens, go no slower than 1/30; for a 200mm, keep it at 1/200 or faster.
Use a Tripod for Stability
Even the best handheld photographers risk blur with slower shutter speeds. A sturdy tripod ensures stability, especially in low light or windy conditions. Lightweight options like travel tripods or gorilla-style supports are great for hikers and outdoor enthusiasts.
Avoid compromising here—a shaky tripod can ruin an otherwise perfect setup. A good tripod keeps your camera safe and shots clean, even on uneven terrain.
Extra Tips for Stunning Mountain Shots
Take multiple shots
Try a few variations of each frame. Conditions can change quickly, especially with clouds and sunlight moving across peaks. Capturing the same scene under different lighting can yield surprisingly different results.
Wait for the light
If time allows, stay a bit longer and wait. Sometimes the most magical light happens just before sunset or right after sunrise. Subtle shifts in illumination can reveal shapes, textures, and colors invisible at other times.
Conclusion: Say Cheese to the Peaks!
Photographing mountains is an art of patience, preparation, and observation. With the right approach and a bit of practice, anyone can turn a dramatic landscape into a powerful image. So, Lykkers, grab your camera, lace up your boots, and step into the mountains with confidence. The next unforgettable photo is just one click away.