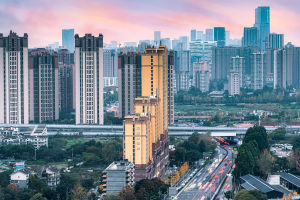
Welcome, Lykkers! Photography and nature go hand in hand. Even though no camera can match the dynamic range of the human eye, knowing the right methods can bring your shots closer to the experience of being there.
This guide offers valuable insights and smart techniques to enhance your landscape images, making them more vibrant and impactful.
Planning Your Landscape Photography
Great shots begin long before the camera is set up. Checking weather forecasts is just the beginning—take note of sunrise and sunset times, and understand how the light will hit your desired location. A highly useful tool for this kind of planning is The Photographer’s Ephemeris. This app and website work with map systems to help visualize light direction and shadow projection.
Camera Settings for Landscapes
Use aperture priority mode to control depth of field while letting the camera decide the appropriate shutter speed. A setting of f/16 is often ideal for a broad depth of field. Set ISO to 100 to achieve maximum image quality. Metering modes like Evaluative or Matrix help ensure balanced exposure across the frame.
If the shutter speed drops below 1/125 second, use a tripod and a remote trigger to avoid camera shake. These tools provide stability and improve sharpness significantly.
Achieving Sharpness
Manual focus allows more control in landscape work. To maximize clarity, apply the principle of hyperfocal distance. This technique helps extend the sharp zone from a certain distance all the way to the horizon. The exact focus distance depends on focal length and aperture, so consider using reference charts or apps to determine it accurately.
Understanding Natural Light
Light plays a vital role in landscape photography. Its quality and direction change dramatically during sunrise and sunset, creating powerful mood shifts. During these hours, colors warm up and shadows grow longer, offering a magical atmosphere that can transform a scene.
The Golden Hour
This is the period just after sunrise and before sunset. The sunlight is softer and warmer, adding depth and vibrance to the landscape. It’s especially effective in spring and autumn when the air is clear and the light is crisp.
The Blue Hour
Right before sunrise and just after sunset, the sky takes on a soft blue hue. During this brief window, natural and artificial light often balance perfectly. It's an excellent opportunity for capturing rich colors and serene compositions, but time is limited—prepare in advance.
Adjusting to Changing Light
Light changes quickly during the golden and blue hours. Keep an eye on your camera settings, especially if shooting manually. Choose whether to prioritize aperture or shutter speed and adjust the other parameters accordingly. Use higher sensitivity settings only when necessary, and rely on tripods to maintain quality during slower exposures.
Working with Challenging Light
While clear skies or overcast conditions may seem uninspiring, they can offer creative opportunities. Instead of avoiding them, adapt your style. Bright conditions are excellent for contrast and shadow play, while cloudy days can enhance color saturation and detail.
Backlight on Clear Days
When sunlight is strong, consider pointing the camera toward it. Backlighting can add dramatic contrast, silhouette effects, and high color intensity. Use shadows and reflections creatively for striking compositions.
Cloudy Days Bring Detail
Overcast skies can reveal hidden textures and enhance the appearance of natural surfaces. This type of lighting is perfect for scenes that rely on subtle tonal variations. It’s also excellent for monochrome photography.
White Skies Don't Mean Boring Photos
When the sky is featureless and bright, it may overwhelm your frame. Try leaving it out of the composition entirely. Focus on ground-level elements, patterns, and colors. These situations are ideal for minimal-style images where simplicity becomes the key strength.
Choosing the Right Lens
Different lenses bring different possibilities. Wide-angle lenses capture expansive scenes and foreground detail. Standard zoom lenses offer flexibility in composition. Long lenses isolate distant features, compress space, and bring hidden shapes into focus. A prime lens, while fixed in focal length, often delivers superior sharpness and minimal distortion.
Building Strong Compositions
A well-thought-out composition draws the eye and creates harmony. One reliable method is the "rule of thirds." Divide the frame into nine equal parts using two vertical and two horizontal lines. Place the key subjects along these lines or at their intersections. Many cameras allow an overlay grid to assist with this directly in the viewfinder or screen.
Creating Depth
Adding elements in the foreground can create a sense of depth and connection between the front and back of the frame. Natural features like rocks, water, or fallen leaves can serve this purpose well.
Let the Landscape Speak
Landscape photography is about reading the scene and letting it guide the approach. By preparing in advance, understanding light, adjusting settings wisely, and applying strong compositional techniques, anyone can elevate their work and capture nature’s finest moments. With patience and creativity, every frame can tell a powerful visual story. Happy shooting, Lykkers!


