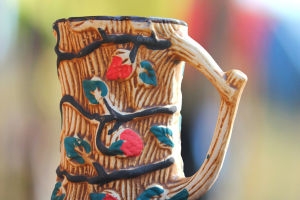
A customized mug is a practical vessel for enjoying your favourite beverages and reflects your unique personality and creativity.
Creating your personalized mug allows you to express yourself and make a statement with a one-of-a-kind piece.
1. Selecting the Base Mug:
Choose a base mug to serve as the foundation for your personalized creation.
Ceramic or porcelain mugs are famous for their durability and ability to withstand high temperatures. Select a blank, unglazed mug that provides a smooth surface for easy design application.
2. Planning Your Design:
Consider the theme, colours, and style you want to incorporate into your mug. You can sketch your ideas on paper or use design software to visualize the final look. This step will help you map out the placement and arrangement of your designs on the mug.
3. Choosing Decoration Techniques:
There are various decoration techniques to choose from when personalizing your mug. Some popular options include:
a. Ceramic Paints: Ceramic paints allow you to paint directly on the mug's surface. They come in a wide range of colours and finishes. Ensure the paints you choose are food-safe and suitable for ceramic or porcelain surfaces.
b. Decoupage: Use decoupage techniques to apply patterned paper, fabric, or unique decals onto the mug's surface. This method allows for intricate designs and texture variations.
c. Vinyl Stickers: Vinyl stickers or decals offer ease and precision in creating designs. They can be customized and cut into specific shapes or designs using a cutting machine. Apply the stickers to the mug's surface, ensuring they are firmly adhered.
d. Heat Transfer: With heat transfer techniques, you can print your designs onto special transfer paper using a compatible printer and then transfer the design onto the mug's surface using heat from a heat press or iron.
4. Applying the Design:
Following your chosen decoration technique, it's time to apply your design to the mug:
a. Prepare the mug's surface as per the specific technique's instructions. For example, if using ceramic paints, lightly sand the surface to promote paint adhesion.
b. Proceed with careful painting, sticking decals, or applying the chosen design onto the mug surface in alignment with your planned design. Precision and attention to detail are crucial to achieving the desired result.
c. Allow the design to dry or cure per the instructions specific to the chosen decoration technique. This may involve air-drying or baking the mug in an oven according to the recommended temperature and time.
5. Finishing Touches and Sealant (Optional):
You may choose to add final touches or seal the mug for added protection:
a. Use additional decorative elements like glitter, beads, or rhinestones to enhance your design. Adhere to them using appropriate craft glue.
b. Apply a food-safe sealant or varnish to protect the design and improve its longevity.
Go through these steps to make a unique and customized mug that reflects your taste and style.


