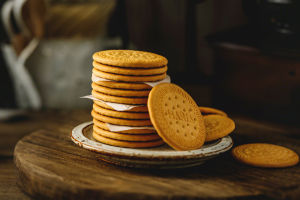
Have you ever seen your little one light up at the sight of a cute cookie? Today, we're going to make something both adorable and delicious—cartoon cookies that are a huge hit with kids!
These buttery, crispy bites are easy to make, fun to shape, and perfect for a sweet bonding moment with your children. So grab your aprons, Lykkers—we're baking joy today!
What We'll Need
Here are the ingredients we'll use to make about 15–20 little cookies, depending on the size of your cookie cutters:
• 60g of unsalted butter (softened),
• 30g of powdered sugar,
• 105g of cake flour (or low-gluten flour),
• 20g of egg liquid (about half an egg),
• 20g of milk powder,
• A set of cartoon cookie cutters.
You don't need anything fancy—just a few ingredients and a little patience!
Step 1: Soften the Butter
Let's start with the butter. Cut it into small chunks and let it soften at room temperature. We will know it's ready when you can gently press it with finger and leave a dent.
Now, sift in the powdered sugar right on top.
Step 2: Mix Carefully
Before grabbing the mixer, use a spatula to gently press and blend the butter and sugar. This keeps the sugar from flying everywhere. Once it's mixed a bit, go ahead and whip it with a hand mixer or whisk until smooth. No need to overdo it—just mix until it's even and creamy.
Step 3: Add the Egg
Break an egg, beat it, and measure out 20 grams. Add it in two parts: pour in half, mix well, then add the other half. This helps it blend smoothly without breaking the butter.
Step 4: Add the Dry Ingredients
Mix the flour and milk powder together, then sift them into the bowl. Use a spatula to fold everything together gently until you don't see any dry spots. Don't overmix—we want the dough soft but firm.
Step 5: Form the Dough
Now comes the fun part—getting hands-on! Put on a pair of gloves and gently press the dough into a ball. If it feels too soft, no worries—just pop it in the fridge for a bit to firm it up.
Step 6: Roll It Out
Sandwich the dough between two sheets of parchment paper. Then roll it out evenly to about 0.3 cm thick. Don't roll it too thin—thin cookies may lose their shape during baking.
Step 7: Freeze Before Cutting
Here's a helpful tip: slide the rolled dough (still between the parchment) into the freezer for about 20 minutes. This helps firm it up, so your shapes will come out clean when you press them with cookie cutters.
Step 8: Time to Cut!
Now the real fun begins! Take out your favorite cartoon cookie cutters—maybe bears, cats, or stars—and press them into the dough. If you're worried about sticking, dust the cutters with a little flour first. Got leftover dough? Just roll it out again, freeze, and cut more cookies!
Step 9: Preheat and Bake
Place your cookies on a baking sheet lined with parchment paper. Preheat your oven to 160°C (320°F) using both upper and lower heat. This usually takes about 10 minutes.
Step 10: Bake to Perfection
Slide the cookies into the middle rack and bake for about 10–15 minutes. Watch closely—once the edges turn a light golden color, they're ready. Every oven's a little different, so keep an eye on them to avoid overbaking.
Step 11: Cool and Store
When they come out, the cookies will be soft—that's normal! Let them cool on a rack, and they'll crisp up beautifully. Once they're completely cool, pop them into an airtight container to keep them fresh and crunchy.
Let's Make Baking Memories
These cartoon cookies aren't just treats—they're little pieces of happiness we can make for kids. Whether it's a weekend activity, a birthday treat, or just something fun to do after school, they're sure to become a household favorite.
So Lykkers, what's your favorite cookie shape? Share it with us and tell us how your cookie adventure turned out. We'd love to hear from you!
Happy baking and happy munching!


