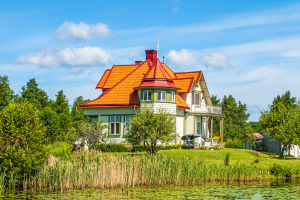
Have you ever stood beside a tranquil lake and felt the urge to freeze that beauty forever? We have too. Lakeside photography is more than just clicking a shutter—it’s about capturing the serenity, the reflections, and the light that dances across the water.
Whether you’re a beginner or a seasoned shooter, these tips will help us turn peaceful lake moments into gallery-worthy photos. Ready to dive in, Lykkers?
Use Reflections to Double the Beauty
Reflections are the soul of lakeside photography. A still lake mirrors the sky, trees, or nearby mountains, adding a sense of symmetry and calm. To make the most of it, we should shoot when there’s little or no wind. Early morning or late evening is ideal—less wind, better light, more magic. Don’t forget to keep the horizon straight to make the reflection look balanced.
Choose the Right Light and Color Temperature
Lighting makes all the difference. During golden hour—shortly after sunrise or before sunset—the soft, warm light gives our shots a dreamy glow. If we want cooler tones, we can adjust the white balance slightly towards blue. But let’s avoid overdoing it; too much editing can ruin the natural feel. Light should enhance, not overpower.
Play with Angles for More Depth
Shooting from a higher angle can help us capture a wide scene, especially if the lake is surrounded by forests or hills. On the other hand, getting down low near the water surface brings out textures and makes reflections more prominent. Including rocks, reeds, or driftwood in the foreground adds layers and makes the image feel more immersive.
Make the Best Use of Natural Elements
Lakes don’t exist alone. Surrounding elements like trees, clouds, boats, or birds can add life to our shots. Let’s use them to create balance and interest. For example, a lone tree reflected in the lake tells a peaceful story, while ripples from a duck add gentle movement. Natural elements help us tell a more engaging visual story.
Perfect Focus, Every Time
Even the most scenic lake shot won’t work if it’s blurry in the wrong places. Autofocus is helpful, but it’s not perfect—especially when we want to highlight specific layers like the water’s surface or a faraway mountain. If our subject isn’t moving, we can use manual focus for more control. When shooting reflections or still water, focus about one-third into the scene for maximum depth of field.
Timing is Everything
We’ve learned that timing can make or break a shot. Wind can destroy reflections, so we aim for calm days. Golden hours bring out rich colors and soften contrasts. Foggy mornings, while tricky, can create mysterious and unique effects. By returning to the same spot in different conditions, we can capture completely different moods of the same lake.
Master the Art of Composing Reflections
To get sharp and artistic reflections, we should:
1. Choose a windless day
2. Use a low angle to get more mirror effect
3. Avoid strong overhead light
4. Slightly overexpose backlit scenes (about +1EV)
5. Use a lens hood to reduce unwanted glare
And remember, less is more. A clean, simple composition often leaves the strongest impression.
Let’s Head to the Lake and Create Something Beautiful
Lakeside photography isn’t just about pictures—it’s about feeling the calm, the silence, and translating that peace into images. With a bit of patience, the right timing, and the tips we’ve just shared, we can all capture lakes in their most breathtaking moments. So Lykkers, pack your camera, head to your nearest lake, and let’s turn that calm water into photographic art. Who’s ready for the next lakeside adventure?
3+1 Tips for Autumn Sunrise Photography on the Lake (Landscape Photography)
Video by Photo Tom


