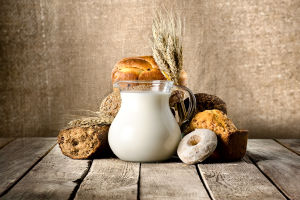
If you're a fan of homemade bread, you might already know that the process can sometimes be a bit tricky. But this super stretchy milk bread recipe is totally worth the effort.
It may take a little longer and involve a few more steps than usual, but the end result is a bread that is incredibly soft and wonderfully stretchy—perfect for any bread lover!
Let's dive into the recipe and steps that will help us create this delicious, pull-apart milk bread.
Ingredients
To make this bread, we need:
• 230g ice-cold milk
• 1 ice-cold egg
• 430g high-gluten flour
• 5g yeast
• 4g salt
• 60g softened butter
• 70g sugar
• 30g milk powder
• For decoration: 1 egg wash and white sesame seeds (to taste)
Step 1: Preparing the Dough
Start by chilling your mixing bowl in the fridge for a while before using it. In a large mixing bowl (or your main mixer bowl), add all the ingredients except the butter, salt, and decoration items. Begin the kneading process for about 4 minutes. After 2 minutes, add the salt through the small hole of the mixer.
Once done, add the softened butter and knead again for 4 more minutes. The dough should be soft and elastic, but not sticky. Once it's ready, form the dough into a ball, cover it with plastic wrap, and let it ferment until it doubles in size.
Step 2: Shaping the Dough
Once the dough has doubled in size, divide it into 20 equal portions. Roll each portion into a ball and cover them with plastic wrap to prevent them from drying out. Let them rest for a while. After the dough has rested, roll each ball into an elongated triangle shape, as shown in the picture. This step is key to ensuring the perfect texture and stretchiness of the final bread.
Step 3: Rolling the Dough
Now, take each of the triangles you've rolled out and gently press the ends down with your fingers. Afterward, carefully roll the dough from the bottom up into a tight cylinder, following the shape of the triangle. Be sure to cover each piece with plastic wrap again after shaping it to prevent it from drying out. If you're working in a warm environment, placing the dough in the fridge can help slow down the fermentation process.
Step 4: Arranging the Dough
Once all the dough pieces are shaped, it's time to arrange them in the baking pan. Lay them in the pan in a diagonal arrangement, as shown in the example picture (1/2/3/4/4/3/2/1). This arrangement helps the bread bake evenly and gives it a beautiful appearance when it's done. Make sure the pan is a 28x28 cm square, and place a bowl of hot water in the oven with the pan to create a warm, humid environment for the bread to rise.
Step 5: Final Fermentation
Let the dough rise in the oven with the hot water for the second fermentation, allowing it to double in size again. Once the dough has risen, take the pan out of the oven and preheat the oven to 160°C (320°F). Lightly beat an egg and brush it over the top of the bread. Then, sprinkle some white sesame seeds on top for a little crunch and added flavor.
Step 6: Baking the Bread
Now, it's time to bake! Place the pan in the middle-lower rack of the oven and bake the bread at 160°C for about 30 minutes. Keep an eye on the bread, and if it starts to brown too much in the last 10 minutes, cover the top with aluminum foil to prevent it from burning. The bread should come out golden brown with a soft and fluffy texture.
Step 7: Enjoying the Stretchiness
Once the bread is done, take it out of the oven and let it cool for a bit before tearing it apart. When you pull the bread apart, you'll notice that it has an amazing stretchiness, almost like melted cheese! The texture is soft, fluffy, and perfect for making sandwiches or just enjoying on its own. The aroma is irresistible, and the taste is absolutely heavenly.
Conclusion
This stretchy milk bread is a real treat, and while it might take a little time and effort, the result is definitely worth it. It's soft, fluffy, and has that amazing stretchiness we all love in a good loaf of bread. Next time you're in the mood to try something new in the kitchen, give this recipe a try. You might just fall in love with making your own bread!
Let us know, Lykkers, have you tried making homemade bread before? How did it go? Share your experiences and any tips you have for making the perfect loaf!


