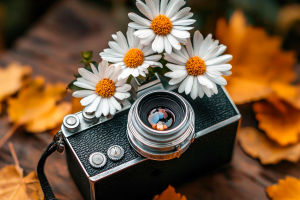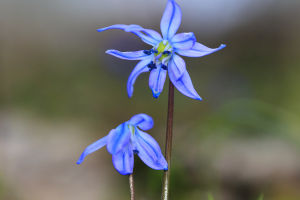
Hey Lykkers! Spring is finally here, and you know what that means—flowers are blooming everywhere, just waiting to be captured! Whether we're walking through parks or passing by flower stalls, these colorful beauties are one of the best things to photograph in this season.
If you've ever tried taking pictures of flowers and thought, “Why doesn't it look like what I imagined?”—don't worry. Today, we're sharing 6 super practical and easy-to-follow tips to help us take gorgeous flower photos with just a camera (or even our phones!). Let's get started.
1. Know When to Use Spot Metering
We've all had those moments—pointing our camera at a flower with the sun behind it, and ending up with a dark, underexposed subject. The trick here is to switch our camera to spot metering mode, especially when we're shooting against the light or the sky.
Spot metering focuses on just a small part of the scene (around 9% of the frame), which means we can tell our camera exactly where to take light readings from. If we want to keep the bright parts from being washed out, we can point our focus at those highlights, lock the exposure, then recompose the shot. If we're in soft, even lighting, using center-weighted or evaluative metering works better for balanced results.
2. Blur That Busy Background with a Big Aperture
Let's be honest—busy backgrounds ruin a lot of great flower shots. One common mistake we make is trying to capture too many flowers in one frame, ending up with a cluttered mess where nothing stands out.
To fix this, we want to simplify our background. Find a clean, solid-colored area if possible. And if that's tough, just open up our aperture (use a small f-number like f/2.8 or f/4). This will blur out the background and draw attention straight to our flower. It also softens the colors behind the subject, making the overall look calmer and more focused.
3. Use Smart Composition Tricks
Don't worry if we're not pros at framing yet—flower photography is actually a great way to practice. Here are some super useful composition styles we can try:
• Diagonal Composition: Ideal for flowers growing along a branch or vine—tilt the frame so the line moves from one corner to the other.
• Rule of Thirds (Nine-grid): Place the flower slightly off-center to create space and balance.
• Center Composition: Works great for close-ups, especially when we're shooting from above or doing macro photography.
• Foreground Framing: Use out-of-focus flowers in the front to give depth and texture to our shot.
All of these help us guide the viewer's eyes to the most beautiful part of the flower—its color, shape, or texture.
4. Mastering Light: Front, Back, and Side
Lighting can make or break our photo. Here's how we can play with light to get totally different vibes:
• Front Lighting (Sun Behind Us): The safest choice. Flowers look clear and colorful, though the image might feel a bit flat.
• Back Lighting (Sun Behind the Flower): This creates stunning, glowing petals and strong outlines. It adds a soft, dreamy feel and makes the photo pop.
• Side Lighting: Adds shadows and depth, kind of like the backlight but with a bit more mood.
Don't be afraid to move around the flower and try all three—sometimes the best angle is just a few steps away.
5. White Add, Black Subtract
Here's a little trick from the pros that applies perfectly to flower photos—white add, black subtract. In simple terms, when shooting white flowers, we should bump up the exposure by 1 stop or more. This keeps the petals bright and clean instead of dull or gray.
Try comparing shots of the same white flower with and without exposure compensation—you'll see a big difference in how fresh and elegant the bloom looks. It's a simple setting that can instantly lift the mood of our photo.
6. Create Magic with a Black Background
Want our flower photo to look like it came straight out of a magazine? Try shooting with a black background. This is a photographer's “minimalism” trick—it removes all distractions and lets the subject truly shine.
Here are three ways we can do it:
• Use Props: Grab a black cloth, curtain, or even a dark umbrella. Hold it behind the flower while shooting, then use a wide aperture to blur it out into deep black.
• Manual Lighting and Spot Metering: Use aperture priority mode, spot meter the brightest part of the flower, and reduce exposure by 1 stop. This will darken everything else naturally.
• Pick a Dark Background Location: Shoot flowers where the background is already shaded or dark—like near trees or walls—and make sure light hits only the flower. The difference in brightness will turn the background nearly black.
Let's Bloom Together!
Lykkers, flower photography isn't about having the most expensive gear—it's all about how we see and capture the moment. With the right light, angle, and focus, even a single daisy can look like a masterpiece. So next time we're out enjoying spring, let's bring our cameras or phones and try out a few of these tips. Who knows—we might just surprise ourselves with how beautiful our flower shots turn out!
Which tip are you excited to try first? Snap a photo and let us know—we'd love to see your blooming masterpieces! 🌸📷


